
Quick snippet on exporting some pesky Photoshop layers with blend modes out to a flat PNG. Thumbnail courtesy Discord member CipherMeisa.
One problem with visual novels is that the images can take up a lot of disk space, especially if your images have some small variations like lighting changes. Ideally, you would be able to have a [base] image, then [lighting-1] layer, [lighting-2] layer, etc. (assuming the variation doesn’t change anything too much in the image such that you would need an entirely new version of the image). One issue is that oftentimes, an artist will create these variation layers with the help of layer blending modes. In Photoshop, these include:
- Overlay
- Screen
- Multiply
- Color burn
- etc.
These blending modes are essentially just some fancy math for how a higher layer in the stack should interact with the lower layers. This might be as simple as subtracting the higher layer’s Red pixels from everything below it, which could end up with some interesting effects.
Since these blending modes are just math, then to replicate the effect outside of Photoshop (or your image editing program of choice), you need to export the Photoshop layer, import the [base] and [blending mode layer] into your game engine, and then tell the engine to apply the same mathematical transformations to the [blending mode layer]. It’s fairly simple, albeit a possibly expensive operation.
Unfortunately, Ren’Py doesn’t support doing such optimized math (using NumPy, which is a C implementation of common mathematical operations and arrays), and it’s difficult to bundle the library into a custom Ren’Py build. So if an image requires some sort of [blending mode layer], and you really don’t want to have two copies of the same image just for the small variation, what can you do?
We discovered a fairly simple way to sort of export the [blending mode layer] into a normal PNG, such that you can just layer the PNG on top of the other layers without doing any fancy math.
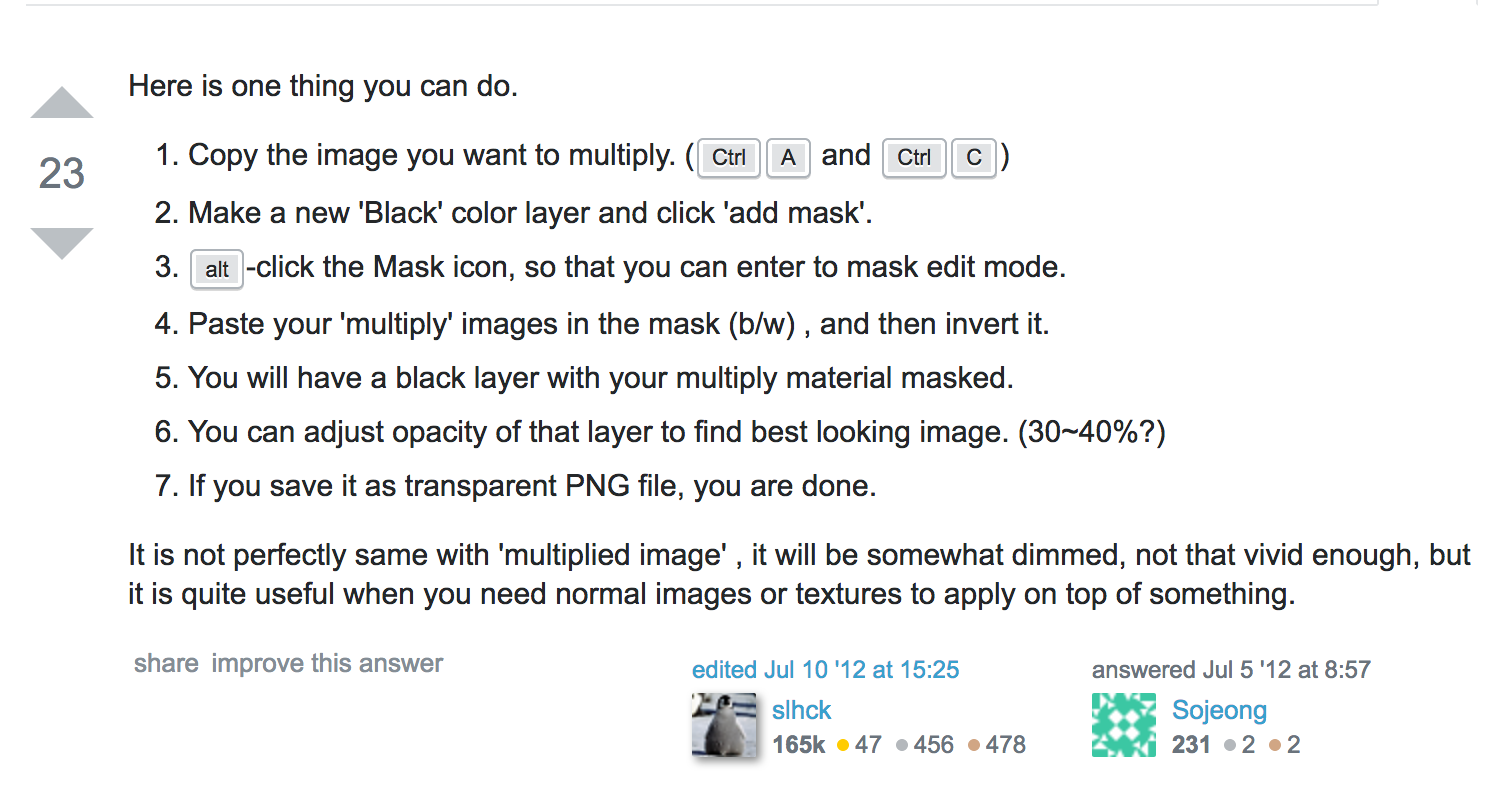
Original post here
The result is not exactly the same, and there is some fiddling with opacity of the [blending mode layer] to make sure it looks alright when layered on your other layers, but, at least for our purposes, it’s Good Enough.